21 March 2013

Chocolate Crunchie Cake

My dad used to eat the same breakfast cereal everyday for years. Always cornflakes. And when it comes to chocolate bars, its a mars bar or a crunchie. For his birthday a few years ago I made a mars bar based cake so I was left with little options to turn to this year....it had to be a crunchie.

Not that I'm complaining, I'll eat any kind of chocolate and you can quote me on that. This year I used the same chocolate cake recipe as before, but used a smaller tin. Its from the Primrose Bakery cookbook and it is without doubt the best chocolate cake ever. It uses dark chocolate not cocoa powder which accounts for a stronger chocolate taste, plus the light soft brown sugar adds a caramel-y taste.


The icing and filling for the cake came from The Art of Baking. The site, run by a couple from Melbourne, Australia, is packed with delicious recipes and beautifully shot images showing the process and final product. I literally spent hours lost in the pages, wishing the images were edible, and that I was back in Australia.

Rani of The Art of Baking says that the idea for her crunchie cake came about when they had 5kg of leftover crunchie chocolate bars...if there was that amount of chocolate in this house I suspect it wouldn't last long enough to be used in a cake.


The chunks of crushed up crunchie in the filling were my favourite part, closely followed by the icing - having two different elements to the cake meant it was like eating an enormous cake-y crunchie bar. Safe to say, if you couldn't tell, I loved this cake!

Chocolate Cake (makes 2 x 9" rounds)
230g dark chocolate
170g unsalted butter
350g soft light brown sugar
3 large eggs separated
370g plain flour
1 1/2 tsp baking powder
1 1/2 tsp bicarbonate of soda
1/2 tsp salt
500ml semi-skimmed milk
2 tsp vanilla extract

1) Preheat the oven to 170C and grease and line two 9" cake tins.
2) Break the chocolate into chunks and melt gently on the hob or in the microwave checking every 30 seconds. Once melted, set aside and allow to cool.
3) Beat together the butter and sugar until light and fluffy.
4) Beat in the egg yolks, followed by the cooled chocolate.
5) Combine the dry ingredients together and sieve.
6) Combine the milk and vanilla extract in a jug.
7) Add 1/3 of the dry mix and beat, followed by 1/3 of the wet. Continue to do this until all the flour and milk have been added - be aware not to overbeat the mix.
8) In a clean bowl whisk the the egg whites to form soft peaks - make sure the whisk you use is clean and free from grease or your whites will not whip!
9) Carefully fold the beaten egg whites into the cake batter using a metal spoon in a figure of 8 until just incorporated. Being overzealous and over folding will knock the air out of the egg whites and you won't get such a mammoth cake!
10) Bake for 30 minutes until a skewer inserted into the middle comes out clean.
11) Allow to cool inside the tins for 10 minutes before removing and cooling on a wire rack.

Crunchie Filling & Chocolate Icing (makes enough to ice & fill a 9" cake)
Butter Filling:
125 g butter
1 1/2 cups icing sugar
2 tbsp milk
4 crushed up crunchie bars

1) Beat the butter with half the icing sugar until well mixed. Add in the milk and remaining sugar and beat again until the mix is smooth.
2) Stir through the smashed up crunchies.

Chocolate Ganache Icing:
375ml single cream
340g dark chocolate, broken up

1) Gently heat the cream and chocolate on the hob until the chocolate has melted.
* Do not allow the cream to boil and be aware the chocolate doesn't burn.*
2) Allow the icing to cool and thicken before use.

10 March 2013

Mother's Day: Lemon Loaf Cake

My mum loves lemon drizzle cake. Like, really loves it. I've never known anyone love it so much.

I think she has a point though, there is something refreshing about the tang of the lemon cutting through the softness of the sponge that is lighter lasting than my favourite coffee cake. So this Mother's Day I got up early and made her a lemon loaf cake for breakfast. Its a recipe by Raymond Blanc that I saw him make on his tv series 'Raymond's kitchen secrets' ages ago and have made once before a few years back.

The plan was to take a large slice of cake to her for breakfast in bed accompanied by the tiny puppy wearing a bow, but the universe conspired against me and my electronic scales ran out of battery before I realised, mid-bake, that we didn't have any bicarbonate of soda! Saved, not for the first time, by the co-op in the next village (the deli as we call it), I managed to produce the cake by half 10 by which time she was full dressed and hungry!

The cake itself is a bit of a labour of love, taking me around an hour and a half to make (not including emergency co-op trip and scale-directed anger) with its' double glazing and second short bake, but its worth it. 


The outside of the cake crisps beautifully like a crust, with added crunch from the double layer of glazing it gets when its out the oven - first comes a layer of melted lemon curd (the original recipe asks for apricot jam but I wanted to try out something different for taste) and the second is a delicious coating of a sugary lemon syrup dried in the cooling oven.


Lemon Loaf Cake (by Raymond Blanc)
5 large eggs
300g caster sugar
140ml double cream
3 lemons, zest only
1 1/2 tbsp rum
pinch of salt
80g unsalted butter, melted
240g plain flour
1/2 tsp baking powder

For the glaze
3 tbsp apricot jam, warmed - I used lemon curd

For the lemon glaze
1 lemon, zest and juice
150g icing sugar

1) Preheat the oven to 180C and grease and line a 2lb loaf tin measuring roughly 26cm x 9cm x 8/10cm.
2) Beat together the eggs, sugar, cream, lemon zest, rum, salt and melted butter.
3) Sift the flour and baking powder together in a separate bowl before beating into the wet mixture to make a smooth batter.
4) Pour into the tin and bake for about 50 minutes - the cake is cooked when a skewer inserted into the middle comes out clean.
5) When fully baked, remove from tin and allow to cool for 10 minutes before covering with the warmed jam glaze. Allow this to dry for about 5 minutes before the next step.
6) Mix the lemon juice and zest with the icing sugar and heat gently until the sugar has dissolved before brushing over the cake. After a few minutes, return the cake to the cooling oven for 5 minutes to dry the glaze to a glossy finish.
7) Slice and enjoy the soft lemony goodness.
8) Thank me later.


10 February 2013

Fluffy Buttermilk Pancakes

This year, the fabulous and delicious pancake day falls on Tuesday 12th February. I love big fluffy American-style pancakes, traditional English pancakes tend towards a runnier batter producing a thinner pancake that is rolled up to be eaten.

There are a plethora of pancake recipes around, the one I used for these came from Sophie at The Cake Hunter via the Company weekly edit which I get through my wonderful clever iPad which I love. Sophie has a great blog packed with recipes and  baking tips coupled with fantastic photos which is definitely worth checking out.


I managed to make 6 massive, thick pancakes from a recipe that should yield around 10....I suspect my additions to the batter didn't help.

Blueberries are a superfood and are packed with antioxidants, stick them in your pancakes and you get a huge health whammy, I promise!


Cover them in peanut butter and it ups the protein content....


For the second batch I mixed plain chocolate chips through the batter which was a brilliant idea. I am a food genius. I used agave nectar to top mine because I'm not a big fan of honey.


I did make a few changes to the original recipe, such as using coconut oil instead of vegetable oil for the batter and to fry the pancakes up, and using almond milk to thin the batter out as I'm cutting back on dairy. Use an alternative if you wish, they will still taste wonderful.

Fluffy Buttermilk Pancakes 
190g plain flour
60g caster sugar
1 tsp baking powder
1 tsp bicarbonate of soda
1 large egg
284ml buttermilk
50ml coconut oil
glug of almond milk
fun things to add to the batter such as blueberries, chocolate chips, cinnamon or ginger.

1) Mix all ingredients together, add the almond milk slowly and mix through until batter becomes thinner.
2) Heat the pan over a medium/high heat and use 1 tsp coconut oil to fry the pancakes.
3) Blob 1 tbsp of batter into the pan and spread it to a pancake-shape; cook until top side bubbles before flipping and cooking the other side.
4) Eat warm and enjoy.
5) The next day, give up chocolate, sweets, smoking, alcohol and general fun for Lent.

9 February 2013

Peanut Butter Protein Bars

This weekend I have mostly not left the house because I am so tired from my first week interning in London - I'm interning for Trace Publicity to help out during London Fashion Week and its the most awesome experience for me to get because its my first fashion internship - so far it hasn't been too busy, but that will all change come Monday as Fashion Week is at the end of next week.

The journey for me takes just under 2 hours, I don't mind it too much but I do get peckish - I get peckish almost every hour on the hour and where I'm working is a multitude of deliciously tempting eateries offering a selection of delectable snack-type items, particularly flapjacks which I cannot resist. However, these are all jammed with sugars and, as always, I am trying to learn to be more 'healthy' and make better choices regarding what I put in my stomach, and so spent my Friday night internet surfing for ideas - I am puppysitting this weekend and am not a housebound loser I swear, my friends will vouch for me!!

I figured I'd need something flapjack-y in appearance and texture so I can pop it in my bag, but lower in sugars and possibly higher in protein to help keep me full and make me feel virtuous - the recipe I've tried out is a combination of oats and crunchy peanut butter, which is easily one of the best things in the world.


The website I grabbed the recipe from is full of fitness advice for women covering diet and workouts and has a heap of 'clean' recipes - in my ongoing quest for inner-health-peace I'll be spending more time surfing this site for tips!

I cut the mix into 8 bars and wrapped each one in clingfilm so I could grab they easily on my way out the door in the mornings - fingers crossed I remember because I have a terrible habit of forgetting everything to do with myself.


They're a little crumbly because I adapted the recipe slightly, chiefly because I was paying too much attention to the tiny puppy and not enough to the recipe and so forgot the almond milk, but as I'd added coconut oil anyway I think I've saved myself any grief there!


Peanut Butter Protein Bars (adapted by mistake from Miss Fitness Life)
2 cups oats
5-6 scoops of protein powder
4 tbsp peanut butter
1 tbsp coconut oil
1/2 cup flaked almonds
1/2 cup pumpkin seeds
2 tbsp ground flaxseed

1) Mix the dry ingredients together.
2) Melt together the peanut butter and coconut oil - I blasted it for 30 seconds in the microwave - and mix thoroughly through the dry ingredients.
3) If your mix is looking very dry and crumbly, add some almond milk gradually and mix through until the mix softens.
4) Press into a lined 8x8 tin, cover and place in the fridge with the mixture pressed flat - mine was covered with condiment jars!
5) After an hour, cut into bars and wrap to store in the fridge.

2 February 2013

Chelsea Buns

The last time I made chelsea buns I was at secondary school and made them in food tech; they were such a success that I went home clutching the recipe and insisted Mum take me to the supermarket immediately so I could make them again. I remember being given fresh yeast for free by the supermarket, my teacher told us they couldn't sell it to you so I wonder if dried yeast wasn't available over 10 years ago.

This time around I used dried yeast, but did make some other tweaks of my own, entirely due to eagerness to bake and lack of ingredients.


When Mum said she fancied something 'cakey and raisiny' this morning, I did my usual google images search for ideas and settled on making chelsea buns; the inside is filled with brown sugar and raisins, and pulled out my trusty 'Great British Book of Baking' for a fail-safe recipe.


It was only once I'd melted the butter into the milk (see recipe below) that I realised I only had 340 grams of wholemeal bread flour, not 450 grams of white bread flour. Cue a mild panic and decision to supplement the bread flour with plain white flour to make up the amount needed. This combination of flours, and the heavier quality provided by the wholemeal flour, which often doesn't rise as much as white flour, and not enough time for the dough to prove first time around meant the buns were dinky, but I prefer to call them 'bitesize'!

When I wrote up this post, I realised that I rolled by dough rectangles from end-to-end, i.e. from the short end up, but the recipe states to roll them from one long side like a Swiss roll - this is very likely another reason they were so teeny!  


Chealsea Buns (from 'Great British Book of Baking)
175ml milk
50g unsalted butter
450g strong white bread flour
1 tsp salt
3tbsp caster sugar
1 x 7g sachet of dried yeast
1 medium egg
For the filling:
50g unsalted butter
75g dark muscovado sugar
150g dried vine fruits (raisins, sultanas, currants)
For the sticky glaze:
2tbsp milk
2tbsp caster sugar
2tbsp runny honey
*a roasting

1) Gently heat the milk and butter together until the butter has melted, then allow to cool until lukewarm.
2) Meanwhile, combine the dry bun ingredients in a large bowl and make a well in the centre.
3) Whisk the egg into the milk and butter mixture, and pour into the well of the dry ingredients.
4) Using your hand, slowly work the flour into the liquid to make a soft, not sticky, dough.
5) Turn the dough out onto a well-floured surface and knead well for ten minutes - then return the dough to the bowl, cover with a damp towel and leave somewhere warm to prove, it should double in size and take around an hour.
6) After the proving time, punch the air out of the dough and split it into two equal parts. Roll these into rectangles measuring roughly 38 x 13cm.
7) Sprinkle the rectangles with the sugar, followed by the dried fruits and roll the rectangles from one long side like a Swiss roll, being gentle but firm to make tight scrolls.
8) Cut each scroll into 8 even slices and arrange in the tin for further proving - try not to let them touch and use extra tins if needed as, during the next 40 minutes or so, they'll almost double in size. Re-cover and allow to prove for around 40 minutes.
9) Heat the oven to 200C and uncover and bake the buns for 20-25 minutes until golden in colour; 5 minutes before they are due to 'finish', remove the buns and brush over the glaze (see next step).
10) Make the glaze whilst the buns are baking by gently warming the ingredients together without allowing the liquid to reach a boil.
11) Allow to cool before attempting to eat.

26 January 2013

No-bake Chocolate, Walnut & Avocado Cake

Are you struggling to stick to your New Year diet plan? Do you find yourself dreaming in cake? Is it taking all your strength to overcome that desperate craving for chocolate?

Then look no further, for I have found........A CHOCOLATE CAKE THAT IS (kind of ) GOOD FOR YOU!

Yes folks, you heard me, this once-in-a-lifetime no-bake chocolate, walnut & avocado cake is your ticket to the end of your cravings. Care of Australian Women's Health Magazine (I think), you can now make you cake, and eat it, whilst staying true to your New Year plans.

And it actually tastes awesome.


There it is, in all its' crumbly glory. When I first saw this recipe way back in September I was desperate to try it out, but with none of the tools required, I took a photo of the recipe and continued to think longingly of the cake. Cut to being home and trying to 'eat clean' and follow a Paleo diet, I was pretty keen to try this cake out as it fits almost all criteria, but cavemen ate cocoa powder right? We're all friends here.....


The cake itself was super sweet as it uses dates to bind the ground nuts and chocolate, but this is complimented beautifully by the bitter taste of the icing. It really tastes best cool, so I'd recommend refrigerating it before serving. The avocado adds the great texture and creaminess to the icing, and although the flavour is very mild, I found I could still taste it. This doesn't bother me, but see my notes below if you're trying to trick children/suspicious adults into trying your healthy concoction! The orange zest and juice added to the cake lends a strong and welcome zing, stopping the cake from tasting overwhelmingly like chocolate or walnuts.

It's definitely a cake I'd make again, I went back for thirds, I can't put my finger on what exactly kept me coming back but the flavours combined deliciously and I felt rather virtuous afterwards which was novel.

I've popped in the original photo I took of the recipe below, but there are a few things to note:
  • to freeze it instead of putting it in the fridge - it really is a very crumbly and delicate cake so freezing it helped hold it together for a little longer.
  • taste test the icing as you make it - I added extra vanilla and extra cocoa powder to cover the mild taste of the avocado so I could trick my mother into eating it, and the icing should taste bitter.
  • keep it in the fridge!!! Avocados taste HORRID if you leave them out, trust me, I know.

NOTE: If you recognise the recipe and it isn't from Australian Women's Health then please do let me know so I can amend the post!

22 January 2013

Dark Chocolate & Peanut Butter Flappy J's

As my new apron will inform you, I make the very best flappy j's (flapjacks)....I've experimented with the same good-old Be-Ro recipe for a few years and added things, modified it, tried less sweetener, no butter etc. and my most recent variation is dark chocolate and peanut butter.

I know I said I wasn't baking this month as I was on a diet (note the use of past tense) but, I am me, and therefore unable to stick to any diet of any type that does not incorporate baked goods. And with all the snow today I spotted the hahstag #EatForSnow on my Twitter feed whilst lounging in my bed around mid-day (I'm housebound because my Mini doesn't like snow) I figured it was a pretty understandable feeling to have in this cold weather and off I went down the stairs to do some baking.


There's not much I can resist more than peanut butter. I've revolted housemates in the past by settling down in front of the TV with a big jar and a spoon, yes, it's really that good. Throw in some dark chocolate and you're guaranteed a winner. 

Together the flavours were wonderful - the dark chocolate has a bittersweet edge to it which compliments the salty nutty-ness of the peanut butter. The blocks I cut were a little crumbly, but if there's anything I've learnt from my flappy j adventures, it's that the texture varies and soft and crumbly is a winner.

I've decided to do a picture recipe so if you're following it, then you know it looks right....well, that's the logic I follow!

Dark Chocolate and Peanut Butter Flapjacks
50g crunchy peanut butter
50g butter
50g demerara sugar
2 tbsp golden syrup
125g porridge oats
25g wholemeal plain flour
roughly 250g dark chocolate

1) Preheat the oven to 180C and grease and line an 8" square tin - I didn't and it was messy.


2) Melt the two butters, sugar and golden syrup over a low heat until dissolved.


3) Break the chocolate into rough chunks - I opted for a unique and rather aggressive method.


4) Add your dry ingredients to the melted fats and combine well.
5) Press into the tin and bake for 20-25 minutes.


14 January 2013

Kurtosh: Sydney {review}

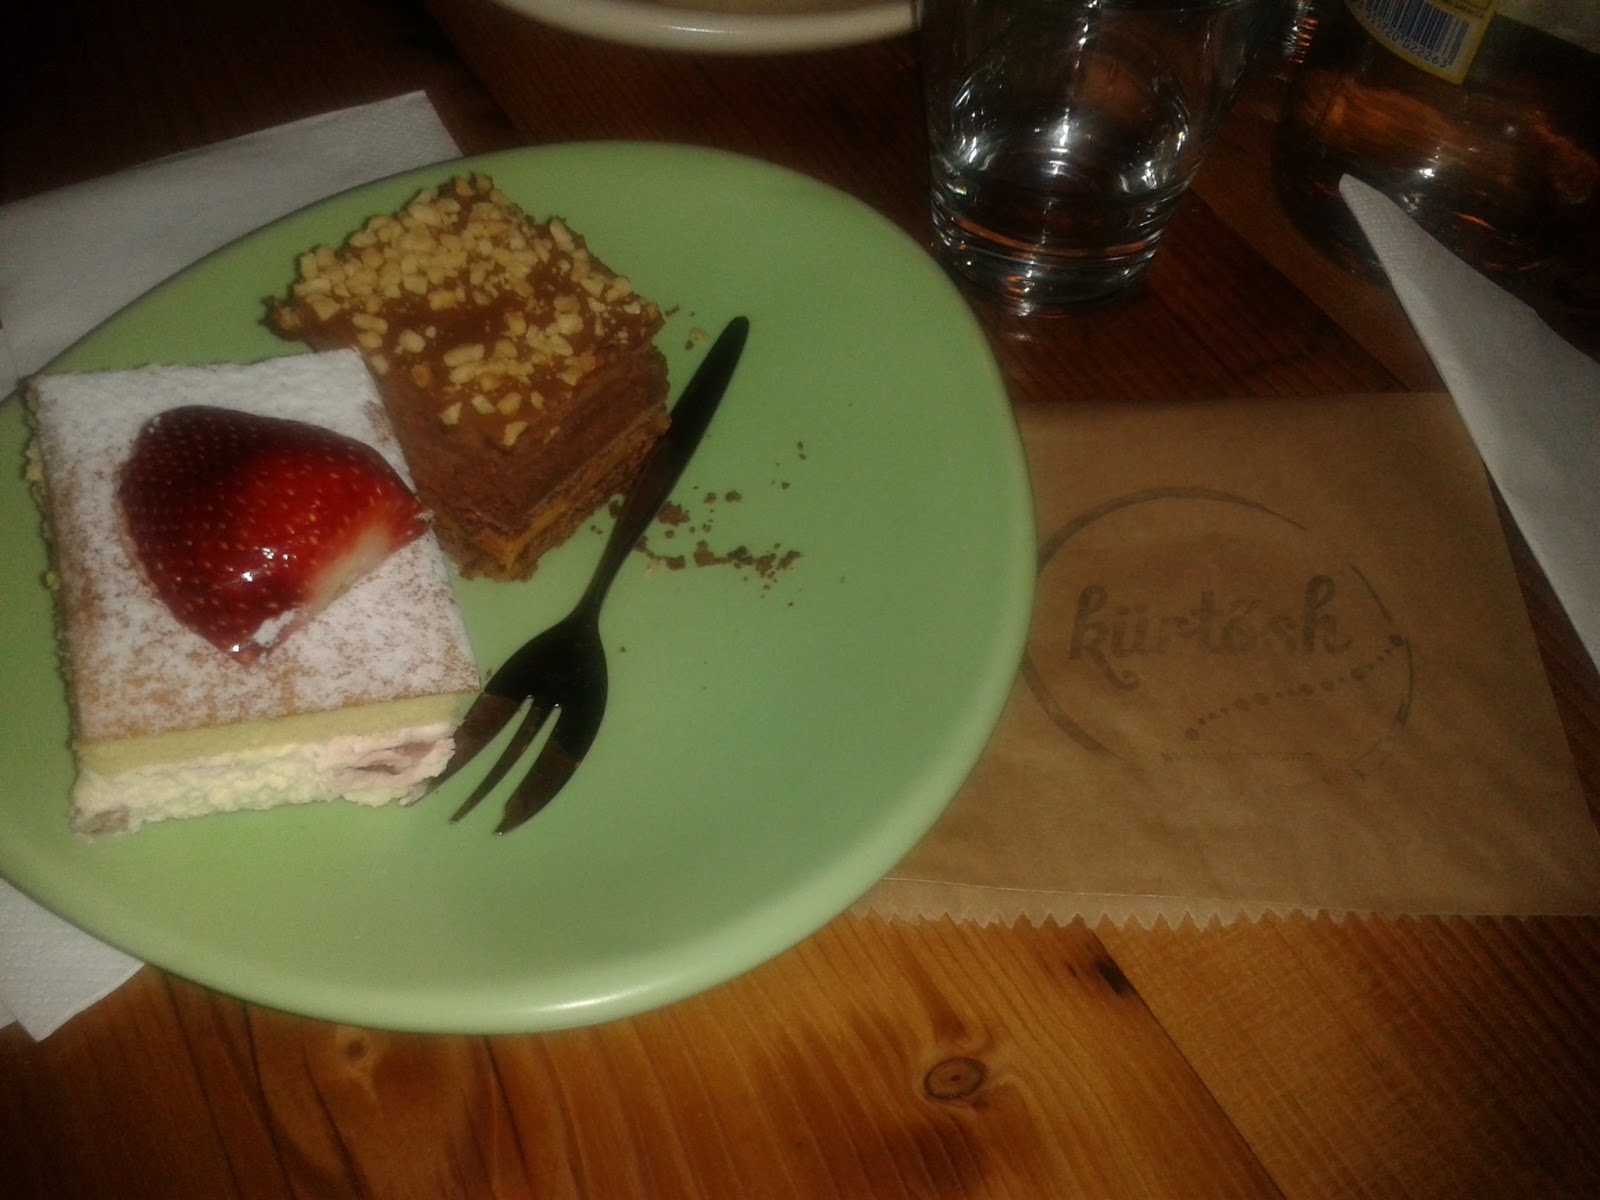
Well and truly sticking to the January tradition of being healthy, I am yet to do any baking this month so am still happily recounting eating trips I had last month in Australia. This time, I'm sharing the cake-eating experience I had at Kurtosh, a bakery in Surry Hills, Sydney.


I was taken to the bakery by a childhood friend who now lives in Sydney and knows her baked goods - under her advice I somehow ended up with two pieces of cake because I 'had to test them out' and it was a late birthday outing! 

Obviously one of my choices was peanut butter and chocolate; the cake was layered on top of a peanuty, crunchy base and between the cake was a thick covering of delicious peanut butter. Unfortunately, with that much peanut butter (how many times can I say those words in one post), the overall effect can get a little heavy in your mouth, but delicious none-the-less.  

I also had a slice of a victoria sponge; the sponge was beautiful and soft and bouncy, just perfect, and filled with a delicate layer of cream. It made a great pair with the heavier peanut butter slice and made me very happy and full.

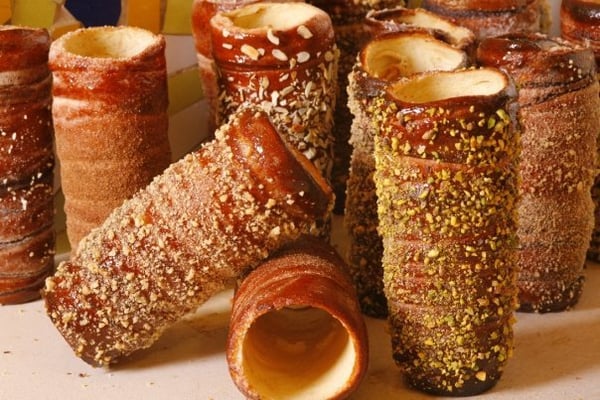
The bakery has two locations in Sydney and is definitely worth a visit; a kurtosh cake, as I was told by the staff, looks a little like a cakey chimney. In store they had kurtosh cakes with a variety of crunchy, sugary toppings which looked delicious, and I can't remember why I didn't try one - probably tempted away by the peanut butter cake!

Kurtosh cakes I found online.


7 January 2013

A quick note...

If you happen to notice that I've created more 'pages' to my blog, including a recipe index and a page of reviews please only look through squinted eyes because they are very much a work in progress.  I wanted to make them live to bulk up my blog, but to create the recipe index I'm re-writing all my old posts as some didn't originally have recipes posted, so bear with me, it'll be complete soon!

Thanks!

Emma Jane

3 January 2013

Lemon and Poppyseed Cake

As is the tradition in January, I am on a no-carb diet.  Therefore I am totally avoiding temptation by only looking at pictures of deliciously sugary cakes, reading recipes and re-visiting how wonderful they tasted. I definitely don't feel like breaking my diet. At all.

Back in the Australian winter, which is in June because they're upside down, I spent a weekend out in the west of New South Wales staying at the home of my friend's boyfriend's parents.  Their house is surrounded by orange and lemon trees, all bulging with fruit, and has a beautiful kitchen so I couldn't turn down the chance to do some baking after a 4 month break.

When Starbucks first opened in my local town at home, all I ever had was a chocolate frappuccino and a 'skinny' lemon and poppyseed muffin. There was something about this combination of tangy lemon and crunchy poppyseeds with its' 'skinny' label that attracted me, and gave me the idea for this cake to use a handful of fresh lemons from the garden.


If I'm honest, I don't remember the recipe I used, except that it has three layers which makes me think its likely to be from the Hummingbird Bakery cookbook....

All I can really remember is that I used the zest of 2 lemons to flavour the cake and a lot of poppyseeds poured and folded through carefully right before spreading the batter in the cake tins.  And the icing is swiss meringue buttercream, flavoured with lemon juice and topped with lemon zest.

It was pretty lemony and quite delicious.

22 December 2012

Zumbarons: A fantasy land of macarons {review}

Prahran market, Melbourne, is well known as the food lovers market thanks to its wide selection of stalls selling fresh fruit and veg, meat, poultry, seafood, flowers, and of course, baked goods.  On this particular Saturday morning I had a deliciously crumbly twisted pastry thing with chocolate and deliciousness everywhere.  I ate it before I remembered that I wanted to take a photo of it....

Standing in one corner of the market is the store The Essential Ingredient, overflowing with wonderful cookbooks, kitchenware and food.  I spent a fair amount of time wandering around dreamily, but most people in the store were doing the same thing.  It was here that I came across the 'Zumbarons' book by Adriano Zumbo.


At the point of purchase I'd never had a Zumbaron, but plenty of macarons.  Before I went away I got really 'into' macarons and made a few batches, with success, which never made it to the blog. 

The recipes in the book range from the standard chocolate mayonnaise macaron, to the bizarre idea of a vegemite macaron.  Well set out, with plenty of pictures and lots of explaining, the recipes seem easy enough to follow but for one aspect; they require fussy specialist ingredients.  You can't just wake up and make these babies, they demand prior planning and preparation, and a nearby specialist store.  Once I've worked out where mine is, I'm definitely keen to have a go and will post my results online, before I've eaten them...


No purchase of said book would be complete without a little tasting trip to an Adriano Zumbo patisserie in Sydney.  I popped over to visit the Manly store, on Sydney's north shore.  It took me a while to find it tucked away down a side street, with only the teeny sign above the door to tell you where it was.  I think I was expecting trumpets, banners and huge signposts....

The store itself was dinky but with plenty of flavours of zumbarons to choose from, as well as various other creations I didn't pay much attention to thanks to the friendly staff who picked up on my pommy accent straight away.  I chose salted popcorn and candy cane zumbarons and happily walked off, box in hand.


Unfortunately the heat of the day took its toll on my little zumbarons, so buy the time I got to eat them they were a little worse for wear.  But still with a crisp shell and softer centre, but the fillings had gone a bit gooey.

The candy cane was filled with a minty, jelly-like frosting.  I suspect some fancy fiddling ingredients were used to make it.  Needless to say it was delicious, but not what I expected when I bit in which was a little confusing!

The popcorn macaron tasted exactly like it should - like popcorn!  But not just any popcorn; this was as delicious as the Coles organic sweet and salted popcorn that I've been known to eat by the bag.

I will almost definitely be googling where to get my fussy ingredients so I can have a go at creating some zumbarons of my own as soon as I can!

20 December 2012

Buche de Noel

The chocolate yule log is traditionally offered as an alternative to Christmas Cake.  Whilst I love Christmas Cake, I would never knowingly turn down a deliciously chocolatey yule log and very obligingly made one this year upon request.

It just happened that the day before my mum suggested we had one, I'd watched the 'Great British Bake-Off' Christmas masterclass and seen Mary Berry's rich, cream filled buche de noel.  I had to make it.


This is the second chocolate log I've made this month, but Mary Berry's offering was infinitely more delicious than its predecessor and even after stuffing myself at Christmas dinner, I have just polished off the remaining log, straight from the tupperware box.

My only problem was that despite following the icing instructions to the t, I ran out of icing halfway down piping the cake on one side so I couldn't ice over the ends as Mary does on the tv show.  I was really annoyed by this and can't work out what went wrong?  Luckily a large ornamental poinsettia was on hand to cover up the bald spot....

Mary Berry's Buche de Noel
4 large eggs
100 g caster sugar
65 g self-raising flour
40 g cocoa powder
300 ml double cream, whipped to fill

Chocolate ganache
300 ml double cream
300 g dark chocolate, chopped into small chunks

1) Preheat the oven to 200C and grease and line a swiss roll tin; sized 33x23cm.
2) To make the sponge cream the eggs and sugar until pale, light and frothy.
3) Sift in the flour and cocoa powder and carefully fold through using a cold metal spoon until just mixed; be gentle and aware that you do not beat the air from the mixture.
4) Pour into the tin and bake for 8-10 minutes.
5) Whilst the cake is in the oven, cut a piece of baking parchment bigger than the size of the sponge and dust it with icing sugar; turn out the cooked sponge onto this, and remove the paper lining the bottom of the sponge.
6) Carefully roll the sponge up tightly; cutting a 'score' 1 inch into the sponge, across the width of it allows for easier rolling.  Allow the cake to cool all rolled up.
7) To make the icing heat the cream until you can just keep your finger in it; add the chocolate, and stir well until melted and combined.  Keep this mix in the fridge to cool for at least an hour as it needs to thicken well before use.

To assemble the cake when cooled, unroll the sponge and spread the whipped cream on top; re-roll tightly.  If you want to have a branch, cut a quarter of the cake from the end at a diagonal, placing it at the side of the cake.
You can either coat the cake with a knife and decorate with a fork to make it look like a log, or pipe the icing on using a star shaped nozzle, which does look lovely!
Dust with icing sugar and eat!

Ginger Cake

At the end of November, whilst I was still in Australia, I flew up to Brisbane to spend some time with my father's side of the family who I've never met.  Its odd to meet people who share your name and ancestors but live on the other side of the world.

My great uncle Brian and I share a birthday; he turned 80 this year when I turned 25.  I arrived in Brisbane after his birthday so whilst I was staying with him and my great aunt, I wanted to make a cake, just because I could!

Brian requested a ginger cake because his mother used to make one when he was a boy and he hadn't had one since - no pressure! A look around led me to the Caked Crusader's blog and her recipe for 'Traditional Ginger Cake'. The blog of the baking superhero was one of the first baking blogs I followed when I became interested in baking , so I was pretty confident a recipe from here would be delicious!

ginger cake


One slight problem cropped up in the process however; I was shocked (not an overstatement) to discover that I couldn't get a jar of stem ginger in the supermarket in Australia. It may have been the branch I was in or this may be a national problem, but it meant no glaze for the cake and I used chopped candied ginger in the cake.  

Traditional Ginger Cake (from Caked Crusader)
225g self raising flour
4tsp ground ginger
1/2tsp ground cinnamon
1tsp bicarbonate of soda
100g unsalted butter
100g golden syrup
100g black treacle
100g light brown sugar
50g steam ginger, finely chopped
2 eggs
200ml milk

Icing
4 tbsps ginger syrup from the stem ginger jar
4 tbsps boiling water
200g icing sugar

1) Preheat the oven to 180C/fan 160C and prepare a 20cm square cake tin.
2) Use the rubbing-in method to combine the dry ingredients until they have a texture like bread crumbs. You can blitz them in a food processor if you have one/are lazy/have long fingernails.
3) Heat the golden syrup, black treacle, sugar and diced ginger in a large pan over low heat until the sugar has dissolved -  there should be no visible sugar crystals. Once dissolved, raise the heat and cook for a couple more minutes before removing from the heat.
4) Carefully beat the eggs and milk into the hot syrup - being careful means be aware that the egg may scramble as the syrup is hot and that looks weird and won't taste good!
5) Beat the crumb mixture into the syrup and stir thoroughly until combined.
6) Pour into the tin and bake for 40-45 minutes.  Allow it to cool in the tin for 10 minutes before removing - cover the cake with glazed when it is in the tin by piercing it with holes and pouring the glaze over.

We had ours sans glaze with ice cream - it lasted for over a week in tupperware!

19 November 2012

Birthday birthday birthday!!

For the past few years I've had a coffee and walnut cake as my birthday cake of choice, made by myself or my mother.  This year I fancied a change and was feeling exciting so I went for a red velvet.

I've made red velvet cupcakes from the Hummingbird bakery several times but I've never made a layer cake.  Being super fussy I knew I wanted to make a 7" cake because I like the way they look (don't ask), but the Hummingbird recipe makes a 3-layer 9" cake, larger than ideal.  I had a quick google of '7" red velvet cake' and came across Gino D'Acampo's recipe on the itv website here.  A little random, but it was delicious!


The cake came up such a vivid colour, it doesn't look like it should taste like chocolate! Traditionally, red velvet cake is iced with cream cheese frosting, but it freaks me out so I like to use white chocolate buttercream on mine.  Swiss merringue buttercream doesn't cope well in heat so I went for a delicious white chocolate buttercream I used to ice a ginger carrot cake with the recipe from Sweetapolita.


Most perplexing for me though was to have a bbq outdoors for dinner on my birthday and not have to wear a million scarves and sweaters to stay alive! 


Gino D'Acampo's Red Velvet Cake
120 g unsalted butter
300 g caster sugar
2 eggs
20 g cocoa powder
40 ml red food colouring
1 tsp vanilla extract
240 ml sour cream
300 g plain flour
pinch bicarb soda
pinch salt

1) Preheat the oven to 170 degrees and grease and line 2 x 7" cake pans.
2) Cream the butter and sugar until light and fluffy.
3) Add the eggs one and a time, beating well after each addition.
4) Beat in the food colouring and vanilla extract.
5) Fold in the sour cream.
6) Sift in the dry ingredients and fold through until well combined and the mixture is smooth.
7) Split the mixture between the 2 pans and bake for 35-40 minutes - mine took 40 minutes.

The recipe on the itv website is different to the procedure I followed, but to be honest, I couldn't be bothered to faff around making it how they suggested and I don't like whisking when the dry ingredients are added so I had a fiddle and made it my own way!

White Chocolate Buttercream - taken from Sweetapolita and makes enough to cover and ice a 10" layer cake
250 g unsalted butter
175 g white chocolate
1 tsp vanilla extract
3/4 tsp almond extract
pinch of salt
750 g icing sugar

1) Cream the butter until it is soft.
2) Melt chocolate in the microwave and add to the butter, with extracts and beat through.
3) Sift in icing sugar and beat well to combine.


14 November 2012

Chocolate Summer Birthday Cake


Of all the things I’ve experienced in Australia, the fact that the seasons are backwards is what has confused and thrown me the most.  For (almost) 25 years November has been cold and dreary and suddenly I am upside down and its’ November and 30 degrees and its summer.  I’m not complaining though because strawberries are in season and they are delicious.

This means that delicious fruit can feature highly in baked goods; its’ been a long time since I baked anything so I took full advantage of a friends’ well-equipped kitchen and a recently-past birthday to take to the bowl and whip up (literally) a cake! It also gave me the perfect chance to use the sweetest plate I own; reading ‘eat cake’ across the middle the plate was given to me when I was in America in June and its’ travelled with me since!

My initial proposal of making a red-velvet cake based on the birthday boy’s sock-colour of choice; red, but this idea was shot down with the tactful phrase ‘Well, it wouldn’t be my first choice...’. 
Thus the ‘Chocolate Summer Birthday Cake’ was born.  Featuring two moist chocolate sponge rounds filled with whipped cream and strawberries and topped with chocolate-fudge icing and a craftily sliced strawberry, this cake combines the best things about summer.  Sunshine is available with prior planning.


Chocolate Cake
6 oz unsalted butter
6 oz caster sugar
3 eggs
6 oz self-raising flour minus 1 tbsp
1 tbsp cocoa powder
Glug of milk

1) Preheat the oven to 180 degrees and grease and line 2 x 7” cake rounds.
2)  Cream the butter and sugar together until light and fluffy.
 3) Beat in the eggs one at a time until each is well combined.
 4) Fold in the flour and cocoa powder.
5)  Spread evenly between the 2 rounds and bake for 20 minutes.

When the rounds are cool fill with whipped heavy cream and chopped strawberries to re-create my summer dream. 

Chocolate Fudge Icing (makes enough to ice and fill an 8" layer cake)
2 oz butter 
2 tbsp milk
2 tbsp cocoa powder
8 oz icing sugar

Sieve the cocoa powder and icing sugar together and beat well with the remaining ingredients.
*the icing should not run or set and is delicious*


5 June 2012

Experimental Zucchini Loaf

Having spent 4 months living in what I affectionately refer to as 'The Shack', its been a while since I've flexed my baking hands.  But today, whilst staying with a friend in Sydney, I took a long walk through the suburbs and city and took in some delicious smells from the multitude of cafes and bakeries I came across and it got me thinking.

To feed my growing obsession of baking with 'things my dad grows' I popped to the supermarket and picked up a zucchini, or in the real world, a courgette (being in Australia I couldn't actually use one from Dad's garden, but the thought is there).  I have no recipes for zucchini bread but a quick search online gave me heaps to read; the one I used is a combination of a few.


The poor little guy didn't really rise much so the loaf looks a little sad, and a lot ugly.  But once I'd sliced it open and popped some in my mouth, superficial factors were forgotten.  For an ugly little thing it tastes good!  The zucchini gives a delicate flavour and moisture to the bread, and the cinnamon and walnuts 

The texture is close, which could be improved if it had risen more, but the texture is right for a tea loaf.  I do wonder if doubling the quantity would have filled the tin better; the batter barely reached halfway and doesn't have much raising agent.  But the top hasn't risen to a dome which would have made for a much more aesthetically pleasing zucchini loaf.

If I was at home I'd have made a few tweaks to the ingredients; for a start I'd have measured the tin I was using.....  I don't like using white flour for tea loaves, I'd rather have used wholemeal flour and demerara sugar along with the soft brown sugar I used today.  This is one loaf I will try again though.

Zucchini Loaf (makes 1 loaf)
1/2 lb grated zucchini
1 1/2 cups plain flour
pinch bicarb. of soda
1 tsp baking powder
1 tsp cinnamon
pinch nutmeg
1/2 tsp salt
1 large egg
1/2 cup sugar
1/4 soft brown sugar
3/8 cup vegetable oil
1 tsp vanilla extract
1/2 cup chopped walnuts

1) Preheat oven to 180 degress
2) Combine flour, bicarb, baking soda and spices 
3) Mix egg, sugars, oil and vanilla extract
4) Add the zucchini and walnut to the dry mix
5) Pour the wet ingredients over the dry and fold gently with a tablespoon until the dry ingredients are just combined
6) Pour into the lined loaf tin and bake for 45 minutes.
7) When fully cooked allow the loaf to cool in the tin for 10 minutes and feel disappointed that its not beautiful
8) Leave it on the bench in your friend's kitchen so her boyfriend can eat it, but eat most of it yourself in the name of science and baking development.


22 January 2012

Cupcake Infographic

I saw this today on Twitter care of http://frugaldad.com/ and thought it was too good to not share!
food

Source: http://frugaldad.com This will be my last post in a while as I fly to Australia tomorrow, fingers crossed baking is a feasible past time there or my blog will be looking very quiet until mid-June! Byeeee

15 January 2012

Chocolate Eclairs

My friend Tom has been getting at me to make him some eclairs for quite a while now.  I offered to buy some from Waitrose today to delay his waiting time but he refused and insisted I had to make them myself, and soon because I'm going away in a week.  Luckily for Tom it's his birthday today AND  I've finished my dissertation so I've made him some birthday eclairs!

I used Raymond Blanc's recipe from his Kitchen secrets book that I found on the Guardian website - I watched the baking episode of the programme about 5 times when it was on last year and got a bit obsessed.  But this was my first time making choux pastry or eclairs.

These ones are beautiful, if slightly odd shaped, but lets just glaze over that.


As I'm practically perfect in every way, a la Mary Poppins, I never make mistakes, especially when I'm baking.  But if I had made a mistake, as unlikely as it is to happen, this might be what happened....

For the first batch, I may have added the egg before the pastry had cooled, thereby producing a pastry/scrambled egg combo.

For the second batch, the recipe confused me (in my defense it is written in a very basic way with all the important parts as footnotes, such as 'use 4 eggs' and the footnote reading 'you won't need them all'.  this is not easy to follow!!!) so I might have added too much egg, and then tried to compensate by adding extra flour.  This is what they look like when you bake them....


For the third batch they came out beautiful but there is a chance that I forgot Raymond's cheeky little tsp caster sugar until after I had added the flour.  But look, everybody makes mistakes.  I don't, but don't judge.

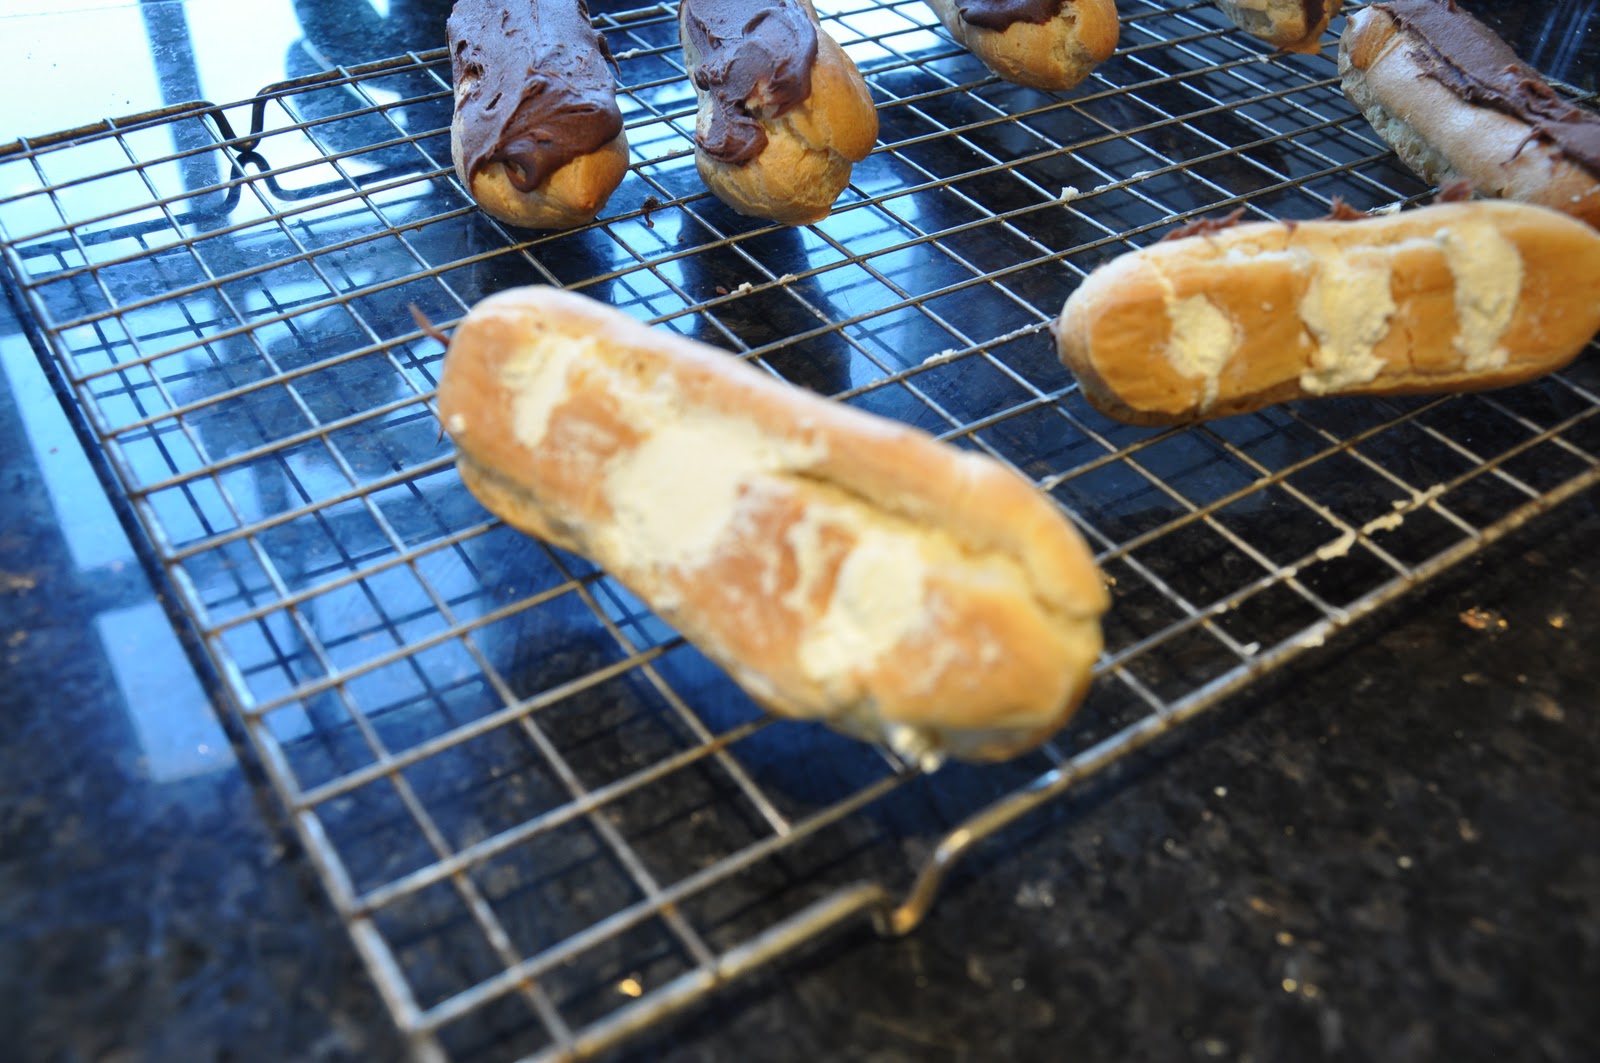
Filling them with cream was fun.  I broke a couple being over enthusiastic and tried to use my flavour injector to little success.


The chocolate icing isn't shiny like it should be because, I admit it, I did make a mistake here and I didn't use fondant icing like Raymond's recipe asks for.  Instead I used ready to roll stuff we had in the cupboard, I'm not sure its the right thing to use or not but it didn't look as pretty as it should but it did taste VERY SWEET, which I am a fan of.
ever hopeful wolfhound, who does actually like choux pastry

wrong thing to use?


Raymond Blanc's Eclairs
65ml water
65ml milk
55g unsalted butter
1 tsp caster sugar
pinch of sea salt
100g plain flour
3 medium eggs, beaten - Raymond's recipe asks for 4 then adds that you probably won't need them all to get the pastry to the right consistency, so I used 3 in my final batch 

- preheat the oven to 180 degress

1) Put the water, milk, butter, sugar and salt in a pan and bring to the boil.
2) Take off the heat and quickly stir in the flour until smooth - it makes a light dough
3) Return to the heat and stir for 1 minute more.
* LEAVE THE MIXTURE TO COOL BEFORE ADDING THE EGGS, scrambled egg doesn't work well in a pastry!
4) Add the beaten egg gradually and beat, always keeping an eye on the consistency: it should be of dropping consistency.  Rest for 5 minutes before using.
5) Using a piping bag and a 1.5cm nozzle, pipe 10 eclairs around 15cm long onto the baking trays and bake for 25 minutes until golden brown.

To fill mine I used whipped double cream with 1 tbsp icing sugar added.  You could add melted dark chocolate, vanilla extract or coffee extract if you're feeling very fun.

Raymond Blanc's Glaze
200g fondant icing
12g cocoa powder
1-2 tsp water

1) Gently warm the fondant; to hot and it will lose it's glaze, possibly what happened to mine.
2) Stir in the cocoa powder and water until combined.
3) Dip each eclair in to cover the top; I had to use a knife to spread my topping as it was too thick to dip.

Other recipes use dark chocolate and heavy cream as a topping.

14 January 2012

Mixed nut, chocolate and jam loaf

I reached a point today where I went a bit weird.  By weird I mean, the words I was writing ceased to make sense, I got a bit twitchy (had been sitting down for hours) and I started to sing to the cat.  Shortly after this began, the cat left and I started to wonder about the state of my sanity.  Coming to the conclusion that I needed a break I took myself into the kitchen to make a mess under the guise of baking.

I have some mixed nuts in the cupboard, good sources of protein you see, and like the taste of baked nuts like in the flappy no j's I made the other day so wanted to use them in a tea loaf.  Then the weirdness came back and, as I was creaming the margarine and sugar, i decided adding jam would be fun.  I made a tea loaf from the Hummingbird Bakery book a while ago and all I really remember about it was that the jam tasted sweet and it fell apart in the tin.  So I added jam to mine, then added more when I'd mixed everything together because i panicked and it looked a bit dry.

The end result actually looks like a loaf and smells so good.  Unfortunately I had a fluff-brain moment when I set the timer and when it went off  I forgot how long I'd set it for so when I sliced the loaf it I discovered that it is slightly underbaked inside, MUST LEARN TO PAY MORE ATTENTION, expect if its my dissertation....


It does taste good though, and also like its good for you.  I love the taste of wholemeal flour so this is a winner for me, it can obviously be made with white flour but then you can't justify eating is as part of a 'healthy' diet, honestly.  The taste of the jam is very light, but is there, I did put some nutella on one slice because I couldn't resist it but the loaf itself does taste a bit nutella-esque because of the baked nuts and chocolate-combo.


Look at the nuts and seeds!! So healthy (looking).  Shame it's sort of collapsed a bit where I grabbed it so tight to slice it before it had cooled down properly

In my quest to avoid my dissertation I have adopted many tactics, varying from taking up knitting (no I haven't finished the jumper yet) to becoming obsessed with the gym.  As my dissertation is about social media I've justified spending a LOT of time on Twitter and came across the #teatimetreats challenge hosted by Kate at http://whatkatebaked.blogspot.com/ and Karen at http://lavenderandlovage.blogspot.com/ here http://lavenderandlovage.blogspot.com/2012/01/new-tea-time-treats-january-challenge.html


Nut, chocolate and jam tea loaf
75g soft light brown sugar
75g margarine
1 medium egg
2tbsp strawberry jam
225g wholemeal self-raising flour
75g mixed nuts, chopped up
probably 75g dark chocolate, chopped up roughly
I poured some seed mix from Tesco into mine because I was overexcited, just to see what it was like

- grease and line a 1lb loaf tin and preheat the oven to 180

1) Cream the butter, sugar and jam.
2) Eat some jam
3) Beat in the egg
4) Sitr in the flour and accessories
5) Eat some jam and chocolate
6) Pour into the tin and bake for longer than 30 minutes, check after 30 and guess, but do remember how long it's been in BEFORE you check it.
7) Eat it and feel virtuous
8) Wonder if you did really have time to go to the gym today and maybe you should be doing work instead of baking and blogging about it.
9) Decide it's fine, but in future, there's no need to write quite so much.....